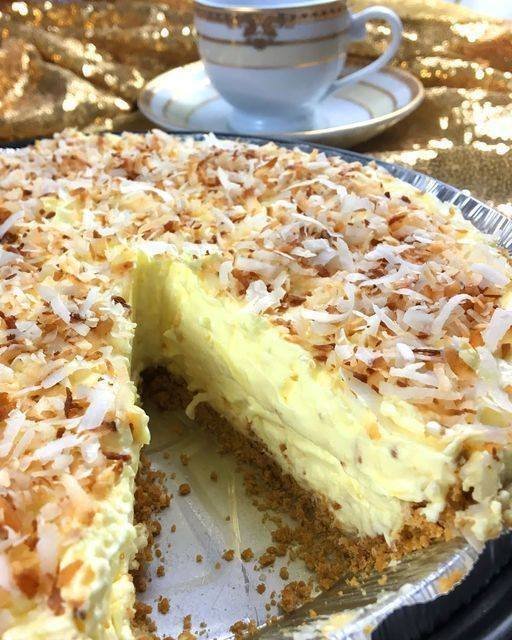
This recipe lives up to its name. A “Killer” Creamy Coconut Pie should have an incredibly rich, silky custard, deep coconut flavor in every bite, and a perfect whipped cream topping. It’s a classic for a reason.
Here is a comprehensive guide to making the ultimate version, from a perfect from-scratch custard to a foolproof no-bake option for hot days.
The Ultimate Killer Creamy Coconut Pie
This version uses a cooked custard base for the richest flavor and texture, poured into a baked pie shell and topped with toasted coconut and fresh whipped cream.
Yields: One 9-inch pie (8-10 slices)
Prep time: 25 minutes
Chill time: At least 4 hours (preferably overnight)
Ingredients
For the Crust:
-
1 (9-inch) deep-dish pie crust, homemade or store-bought
-
Blind bake the crust until golden brown and fully cooked. Let it cool completely.
For the Velvety Coconut Custard Filling:
-
1 cup whole milk
-
1 cup canned coconut milk (full-fat, not lite – this is key for creaminess)
-
1 cup granulated sugar
-
5 large egg yolks (save the whites for another use)
-
⅓ cup cornstarch
-
¼ tsp salt
-
1 ½ cups sweetened shredded coconut, divided
-
2 tbsp unsalted butter
-
1 ½ tsp vanilla extract
-
½ tsp coconut extract (optional, but amps up the flavor)
For the Killer Topping:
-
1 ½ cups heavy whipping cream
-
¼ cup powdered sugar
-
½ tsp vanilla extract
-
Remaining ½ cup toasted coconut (from above)
Instructions
Part 1: Prepare the Crust & Toast the Coconut
-
Blind Bake the Crust: If using a homemade or thawed frozen crust, preheat your oven according to its directions (usually 375°F-400°F). Line the crust with parchment paper or foil, fill with pie weights or dried beans, and bake until the edges are set. Remove weights, prick the bottom with a fork, and bake until the bottom is golden and fully cooked. Cool completely on a wire rack. A soggy crust is the enemy of great pie.
-
Toast the Coconut: Spread 1 cup of the shredded coconut on a baking sheet. (Reserve the other ½ cup for the filling). Toast in a 325°F oven for 5-7 minutes, stirring once or twice, until golden brown and fragrant. Watch closely—it burns fast! Set aside to cool. You’ll use some in the filling and the rest for garnish.
Part 2: Make the Creamy Custard
-
Combine Dry Ingredients: In a medium saucepan (off the heat), whisk together the sugar, cornstarch, and salt. This prevents lumps.
-
Whisk in Wet Ingredients: Gradually whisk in the egg yolks until the mixture is thick, pale, and smooth. It will look like a paste. Slowly whisk in the whole milk and coconut milk until everything is smooth.
-
Cook the Custard: Place the saucepan over medium heat. Cook, whisking constantly, scraping the bottom and corners of the pan. This is crucial to prevent burning and lumps. After about 5-8 minutes, the mixture will begin to thicken and bubble in places. Once it’s bubbling, cook and whisk for 1 full minute to ensure the cornstarch is cooked and the custard is thick enough to hold its shape.
-
Finish the Filling: Remove the pan from the heat. Whisk in the butter, vanilla extract, and coconut extract (if using) until the butter is melted and smooth.
-
Add Coconut: Stir in 1 cup of the untoasted shredded coconut (and about half of your toasted coconut if you want extra flavor throughout) until evenly distributed.
Part 3: Assemble and Chill
-
Strain (Optional but Recommended): For the silkiest texture, pour the hot custard through a fine-mesh sieve into a heatproof bowl. This catches any accidental lumps of cooked egg. Press it through with a spatula.
-
Press Plastic Wrap: Place a piece of plastic wrap directly onto the surface of the hot custard. This prevents a thick, rubbery “skin” from forming.
-
Cool Slightly: Let the custard sit at room temperature for about 15-20 minutes to stop the cooking process and cool down a bit.
-
Fill the Crust: Pour the warm (but not boiling hot) custard into the cooled pie crust. Smooth the top with a spatula.
-
Chill: Press a new piece of plastic wrap directly onto the surface of the filling again. Refrigerate for at least 4 hours, but preferably 6-8 hours or overnight. The pie must be fully chilled and set before adding the topping and slicing.
Part 4: Make the Topping and Serve
-
Whip the Cream: In a large chilled bowl, combine the heavy cream, powdered sugar, and vanilla. Beat with an electric mixer on medium-high speed until stiff peaks form. Be careful not to over-whip into butter.
-
Top the Pie: Spread or pipe the whipped cream over the fully set chilled pie.
-
Garnish: Sprinkle the reserved toasted coconut generously over the whipped cream.
-
Slice and Serve: For clean slices, use a sharp knife dipped in hot water and wiped dry between cuts. Serve immediately.
No-Bake “Killer” Coconut Cream Pie Option
If you want an even quicker version that doesn’t require cooking a custard on the stove, here is a no-bake alternative that is still incredibly creamy.
Ingredients for No-Bake Filling:
-
2 (3.4 oz) packages instant vanilla pudding mix
-
1 (14 oz) can full-fat coconut milk (not shaken, so the cream is separated)
-
1 (8 oz) block cream cheese, softened
-
1 (8 oz) tub Cool Whip (or 2 cups fresh whipped cream), thawed
-
1 cup sweetened shredded coconut
-
1 tsp coconut extract (optional)
Instructions:
-
Prepare the Coconut Cream: Open the can of coconut milk without shaking it. Scoop out the thick solid cream on top into a large mixing bowl (save the watery liquid for smoothies). Beat the coconut cream with the cream cheese until smooth.
-
Add Pudding: Add the instant pudding mixes and beat until combined. The mixture will be very thick.
-
Fold: Gently fold in the Cool Whip (or fresh whipped cream), shredded coconut, and coconut extract until combined.
-
Chill: Pour the filling into the cooled, baked pie crust. Cover and refrigerate for at least 4 hours until set.
-
Top: Top with additional whipped cream and toasted coconut before serving.
Tips for Coconut Perfection
-
Full-Fat Coconut Milk: Don’t use “lite” coconut milk for the cooked version; it has too much water and will make a thin, icy custard.
-
Toast the Coconut: This is non-negotiable for a “killer” pie. It adds a nutty depth and crucial crunch against the creamy custard.
-
Patience with Chilling: A warm coconut pie is a soupy coconut pie. Give it the full time in the fridge to set up properly.