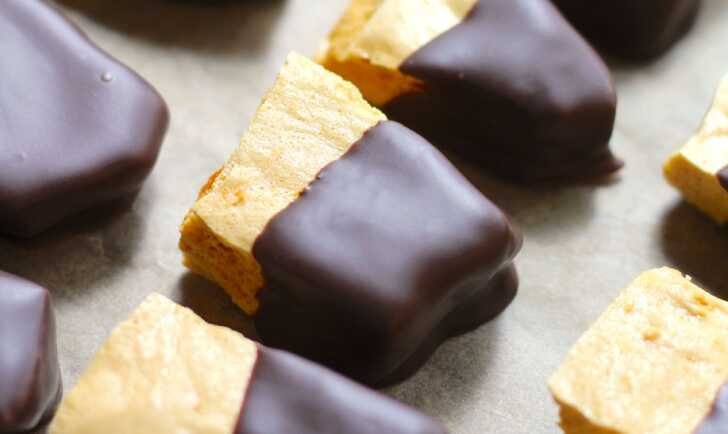
Wisconsin Fairy Food! This is a beloved retro Midwestern treat—also known as “sea foam candy,” “sponge candy,” or “honeycomb toffee.” It’s a light, airy, crunchy confection made from a boiled sugar syrup that’s expanded with baking soda, then coated in chocolate. It’s called “Fairy Food” for its delicate, melt-in-your-mouth texture.
Here’s a classic, tested recipe with tips to ensure success.
🧚 Wisconsin Fairy Food (Chocolate-Covered Sea Foam Candy)
Prep Time: 20 minutes | Cook Time: 15-20 minutes | Setting Time: 1 hour
Yields: About 1 pound of candy
Ingredients
-
1 cup dark corn syrup (light corn syrup can be used but will yield a lighter color and milder flavor)
-
1 cup granulated sugar
-
1 tbsp white vinegar
-
1 tbsp baking soda, sifted
-
10-15 oz chocolate candy coating (or almond bark, or tempered real chocolate)
-
Optional: 1 tsp vanilla extract (added just before baking soda)
Equipment
-
Heavy-bottomed medium saucepan
-
Candy thermometer (critical for success)
-
Large greased baking sheet (or lined with parchment/greased foil)
-
Large heatproof whisk or spoon
📝 Instructions
1. Prepare the Pan
-
Generously grease a 9×13-inch baking sheet with butter or line with greased aluminum foil (do not use parchment alone—it can stick). The foam will expand dramatically, so sides are helpful.
2. Cook the Syrup
-
In the saucepan, combine corn syrup, sugar, and vinegar.
-
Cook over medium heat, stirring constantly until sugar dissolves.
-
Once dissolved, stop stirring and insert the candy thermometer.
-
Cook without stirring until the mixture reaches 300°F (150°C), the hard crack stage. This can take 10–15 minutes. Watch carefully to prevent burning.
3. Foam the Candy
-
Remove from heat immediately and quickly stir in the sifted baking soda (and vanilla, if using). The mixture will foam up vigorously—this is normal!
-
Stir just until combined (do not overmix), then immediately pour onto the prepared pan. Do not spread—let it flow and expand on its own.
4. Cool Completely
-
Let the slab cool at room temperature for at least 1 hour until completely hard and crisp. Do not refrigerate (can cause stickiness).
5. Break and Coat in Chocolate
-
Once cooled, break the slab into bite-sized pieces (tap with a butter knife or use your hands).
-
Melt chocolate coating according to package directions (usually in 30-second intervals in the microwave, stirring between).
-
Dip each piece in chocolate, let excess drip off, and place on wax or parchment paper to set.
-
Optional: Sprinkle with sea salt or crushed nuts before the chocolate sets.
6. Set & Store
-
Let chocolate harden at room temperature (or chill briefly if kitchen is warm).
-
Store in an airtight container with wax paper between layers. Keeps for 1–2 weeks in a cool, dry place.
🧠 Critical Success Tips
-
Candy thermometer is essential—without it, timing is guesswork and can lead to failure.
-
Sift the baking soda to prevent lumps that can cause uneven foaming.
-
Work quickly once the syrup hits 300°F. Have baking soda measured and ready.
-
Do not stir after sugar dissolves to prevent crystallization.
-
Humidity is the enemy—avoid making this on rainy or humid days; the candy can become sticky.
-
Why vinegar? It prevents sugar crystallization and adds a slight tang that balances sweetness.
🔄 Variations & Tips
-
Chocolate choice: “Candy coating” (almond bark) sets harder and is easier for dipping. Real chocolate (tempered) tastes richer but can melt faster in hand.
-
Flavor twists: Add 1 tsp peppermint extract instead of vanilla for a holiday version.
-
Double-dip: For extra chocolate, coat once, let set, then dip again.
-
Crush it: Broken fairy food is delicious sprinkled over ice cream or mixed into popcorn.
🍫 Why It’s a Wisconsin Favorite
This old-fashioned candy is a staple at church bake sales, holiday gatherings, and family treat trays across the Midwest. Its magical transformation from simple syrup to airy crunch, enrobed in chocolate, feels like kitchen wizardry—hence the whimsical name.
Enjoy making (and sharing!) this delightful, crispy, chocolaty bite of nostalgia.