Here is a comprehensive guide to Mastering Prime Rib: From Butcher’s Cut to Table Glory. This will walk you through everything you need to know to select, prepare, and cook a perfect prime rib that is tender, juicy, and deeply flavorful.
Mastering Prime Rib: From Butcher’s Cut to Table Glory
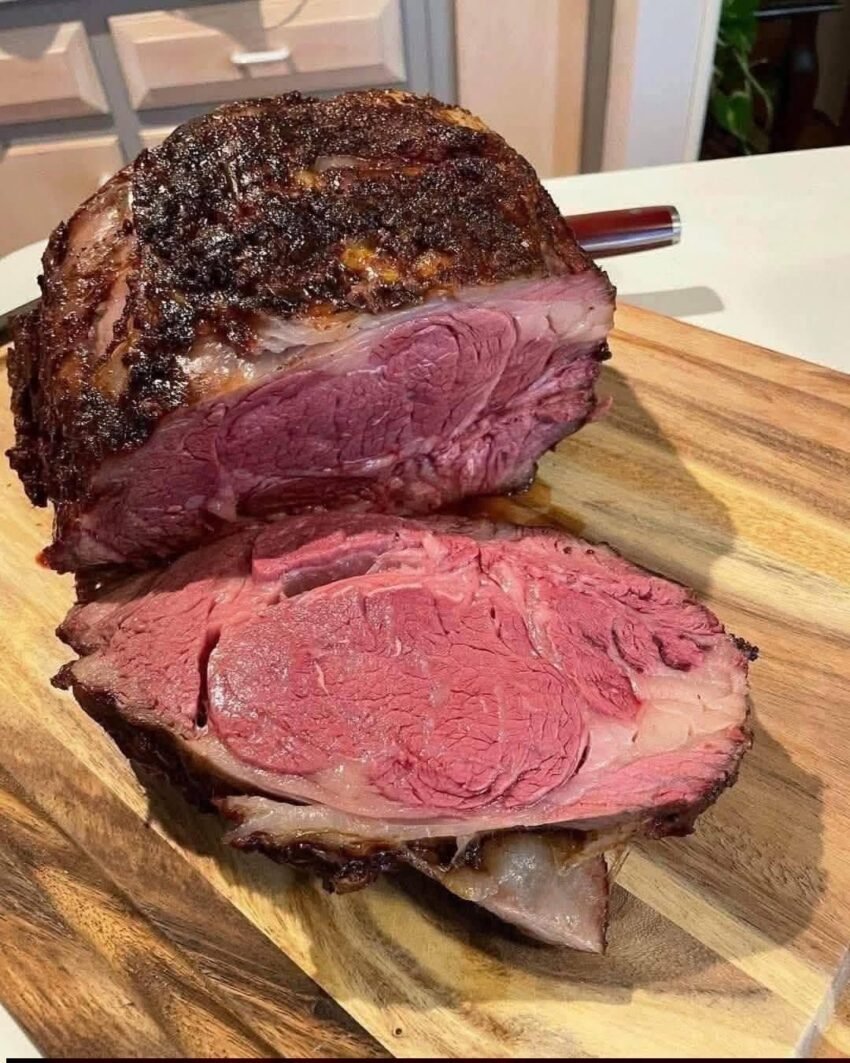
Prime rib is the king of roasts. It’s a special occasion centerpiece that commands attention and delivers incredible flavor. While it looks impressive, it is surprisingly simple to cook if you understand a few key principles.
Part 1: The Butcher’s Cut – Choosing Your Roast
The first step to a perfect prime rib is selecting the right piece of meat. Don’t be afraid to talk to your butcher—they are your best resource.
1. The Cut: What is Prime Rib?
Prime rib comes from the primal rib section of the cow (ribs 6 through 12). A “standing rib roast” is the same cut, just with the bones left in. There are two main styles:
-
Bone-In (Standing Rib Roast): The classic choice. The bones act as a natural insulator, helping the meat cook more evenly and adding flavor. It also makes for a stunning presentation.
-
Boneless: The bones are removed and typically tied back on or sold separately. Easier to carve, but you lose a bit of flavor and moisture from the bone.
2. The Grade: Prime vs. Choice
In the US, the USDA grades beef.
-
Prime: The highest grade available to consumers. It has abundant marbling (the white flecks of fat within the muscle), which translates to the most flavor and tenderness. This is the ideal choice for prime rib.
-
Choice: Still excellent, with less marbling than Prime. It will be very good, just not quite as buttery and rich.
3. The Size: How Much Do You Need?
A good rule of thumb is:
-
Bone-In: Estimate 1 pound per person. (e.g., a 6-pound roast feeds 6 people).
-
Boneless: Estimate ½ to ¾ pound per person.
4. Ask Your Butcher:
-
“Can you French the bones?” This means cleaning the meat off the top of the bones for a cleaner, more elegant look.
-
“Can you tie it for me?” If you buy a boneless roast or one where the bones are removed, having it tied into a uniform cylinder ensures even cooking.
Part 2: The Night Before – Prepping for Glory
1. Dry Brine (The Secret to Flavor)
This is the single most important step. At least 12-24 hours before you plan to cook, unwrap the roast and place it on a wire rack set over a baking sheet. Pat it completely dry with paper towels. Generously season it all over with kosher salt (about 1 tablespoon per 5 pounds). Do not add pepper yet; pepper can burn during the long cook.
-
Why? The salt will initially draw out moisture, but then it will slowly migrate back into the meat, seasoning it deeply while the surface dries out. A dry surface is the key to a beautiful, crispy crust.
2. Bring to Room Temperature
About 2-3 hours before cooking, take the roast out of the fridge. Let it sit on the counter, still on its rack. This takes the chill off and allows for more even cooking.
Part 3: The Method – High Heat vs. Low & Slow
There are two primary schools of thought for cooking prime rib. Both work; choose the one that fits your schedule.
Method A: The Reverse Sear (Preferred Method for Even Doneness)
This method is nearly foolproof. You cook the roast low and slow first, then blast it with high heat at the end to form the crust.
-
Preheat: Preheat your oven to 250°F (120°C) .
-
Season: If you dry-brined overnight, you may not need more salt. Add a generous coating of freshly ground black pepper and any other herbs you like (rosemary, thyme).
-
Roast Low: Place the roast, bone-side down, in a roasting pan. Insert an oven-safe meat thermometer into the thickest part of the meat, avoiding the bone. Roast until the internal temperature reaches 10-15°F below your target doneness.
-
*Target: 115°F for Rare, 120°F for Medium-Rare, 130°F for Medium.*
-
This will take roughly 3-4 hours for a 6-8 lb roast. Start checking early.
-
-
Rest (First Rest): Remove the roast from the oven, tent it loosely with foil, and let it rest for 30-45 minutes. The temperature will continue to rise slightly (carryover cooking).
-
The Sear: Increase the oven temperature to 500°F (260°C) or as high as it will go. Once screaming hot, remove the foil and return the roast to the oven. Roast for 5-10 minutes, watching closely, until the outside is deeply browned and crispy.
-
Rest Again (Briefly): Let it rest for 10-15 minutes before carving.
Method B: The High-Heat Sear then Roast (The Classic)
This method sears first to lock in flavor, then finishes at a lower temperature.
-
Preheat: Preheat your oven to 450°F (230°C) .
-
Sear: Season the roast generously. Place it in a roasting pan, bone-side down, and roast at 450°F for 20 minutes.
-
Reduce Heat: Without opening the oven, reduce the temperature to 325°F (165°C) .
-
Continue Roasting: Roast until the internal temperature reaches 5-10°F below your target (about 115-120°F for medium-rare). Use a meat thermometer.
-
Rest: Remove from the oven, tent with foil, and let it rest for at least 30 minutes. This is essential.
Part 4: The Temperature Guide (Doneness)
| Doneness | Final Internal Temp | Remove from Oven At |
|---|---|---|
| Rare | 120-125°F | 115-118°F |
| Medium-Rare | 130-135°F | 120-125°F |
| Medium | 140-145°F | 130-135°F |
| Medium-Well | 150-155°F | 140-145°F |
Crucial Note: Carryover cooking means the internal temperature will rise by 5-10°F while the roast rests. Always pull it out a little early!
Part 5: Carving and Serving – Table Glory
1. Remove the Bones (if bone-in): Before slicing, run a sharp knife along the bones to separate the entire roast from the bone rack. You can tie the bones back on for presentation, or serve them as a treat for the butcher (the best cook’s snack).
2. Slice Against the Grain: Look at the direction of the muscle fibers. Slice perpendicular to them (across the grain) for the most tender pieces. Aim for slices about ½-inch thick.
3. Serve with Au Jus: The pan drippings are liquid gold.
-
Pour the drippings from the roasting pan into a fat separator or a glass measuring cup. Spoon off the excess fat.
-
Place the roasting pan on the stovetop over medium heat. Add a cup of beef broth or red wine and scrape up all the browned bits (fond) from the bottom. Simmer for a few minutes, strain, and serve alongside the beef.
Summary Checklist for Success
-
Buy Prime Grade if possible, with bones in.
-
Dry Brine with salt 24 hours ahead.
-
Use a Meat Thermometer – do not guess!
-
Low & Slow (Reverse Sear) for the most even doneness.
-
Rest the Meat for at least 30 minutes.
-
Slice Against the Grain.