Here’s how to achieve a perfect rustic, unloafed sourdough at home.
What Makes It an “Unloaf”?
-
No Pan Constraint: Baked directly on a preheated surface (Dutch oven, baking steel, or stone). This allows for maximum oven spring—that dramatic rise and ear formation where the bread has been scored.
-
High Hydration: Typically 70-80% hydration (water-to-flour ratio), which creates the steam that pops open the crumb and forms those big, irregular holes.
-
Long, Cold Fermentation: Flavor comes from time, not yeast. A long, cold overnight proof develops the signature tang and rustic blistered crust.
The Master Recipe: Naturally Leavened Rustic Sourdough
This formula uses a basic 1:10:15 ratio (starter:water:flour) for two loaves, assuming some starter discard. Here’s a perfected timeline that starts in the evening for a bake the next afternoon.
Ingredients:
-
Leaven (Make the night before or early morning):
-
1 tablespoon (15g) active sourdough starter
-
75g room temperature water
-
75g bread flour (or 50g bread flour + 25g whole wheat)
-
-
Final Dough:
-
750g high-protein bread flour
-
200g whole wheat flour (or dark rye for a deeper color and tang)
-
700g water (lukewarm, about 85°F / 29°C) — this is ~75% hydration
-
20g fine sea salt
-
All of the ripe leaven (about 150g)
-
Step-by-Step: The “Unloaf” Process
Day 1 Evening: Build the Leaven
-
Mix the 15g starter, 75g water, and 75g flour in a jar. Let it sit at room temperature overnight (8-12 hours). It’s ready when it’s doubled, bubbly, and smells tangy-sweet. Drop a spoonful in water—it should float.
Day 2 Morning: Autolyse (The Secret to Rustic Crust)
-
Mix Flour and Water: In a large bowl, combine the 750g bread flour, 200g whole wheat flour, and 680g of the water (reserve the last 20g). Mix by hand until no dry bits remain. Cover and let rest for 1 hour. This hydrates the flour, starts gluten development without kneading, and contributes to a custardy, open crumb.
Day 2 Mid-Morning: Mix and Strengthen
-
Add Leaven and Salt: Add all the ripe leaven and the salt to the dough. Use wet hands to pinch and squeeze it all together until completely integrated.
-
Bassinage: Work in the reserved 20g of water slowly if the dough feels too tight. The dough will be shaggy and sticky.
-
Stretch and Fold (No Kneading): Over the next 2 hours, perform 3-4 sets of “stretch and folds.” With a wet hand, reach under the dough, stretch a section up, and fold it over the top. Rotate the bowl a quarter turn and repeat 4-5 times per set. You’ll feel the dough transform from a sticky mass into a smooth, elastic, and cohesive ball.
Day 2 Afternoon: Bulk Fermentation & Pre-Shape
-
Bulk Ferment: Cover the bowl and let it rise at a warm room temperature (75-78°F) until it’s puffy, gassy, and nearly doubled. This takes 4-5 hours depending on your kitchen.
-
Pre-Shape: Turn the dough onto a lightly floured surface. Divide in two. Gently shape each into a loose round (boule) or an oblong (batard). Let them rest, seam-side down, uncovered for 25 minutes. This bench rest is crucial for a relaxed shape that won’t tear.
Day 2 Late Afternoon: Final Shape & Cold Retard
-
Final Shape: Flip a rested round over. Gently flatten, then fold the left and right sides in, and roll it up from the top, tightening the skin with the edge of your hands as you pull it towards you. This creates tension, the key to a tall, rustic “ear.”
-
Proof: Place the shaped loaves seam-side UP (or down, if you prefer a smoother rustic look) in heavily floured bannetons (proofing baskets).
-
Cold Ferment: Cover and place in the refrigerator overnight (12-16 hours) . This is non-negotiable for a true unloaf. It slows the yeast but allows bacteria to produce the complex, tangy acids and breaks down proteins for a crust that blisters into a glassy, mahogany sheen.
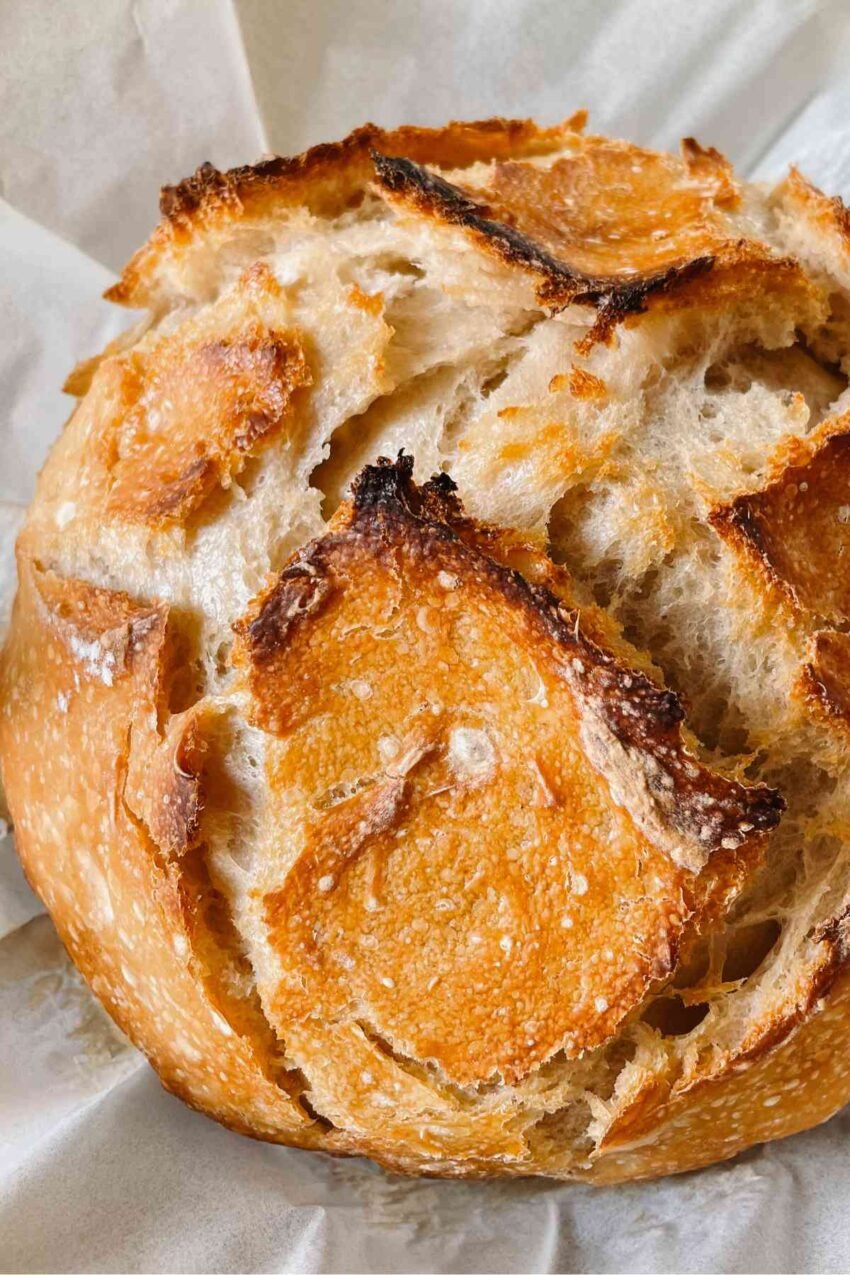
Day 3: The Bake (Creating the Rustic Crust)
This is where the unloaf comes alive.
-
Preheat Aggressively: Place a Dutch oven (with lid) or a combo cooker inside your oven. Preheat to 500°F (260°C) for a full hour. You need a screaming hot thermal mass.
-
Score with Confidence: Remove one loaf from the fridge. Lay a piece of parchment over the banneton, flip it onto a cutting board. Dust with rice flour for contrast. Using a sharp lame (scoring blade), make one decisive, ½-inch deep cut at a shallow 30-45 degree angle. This creates the signature “ear.” Don’t hesitate; you’re guiding the expansion.
-
Bake Covered: Carefully lift the parchment and lower it into the blazing hot Dutch oven. Cover with the lid. This traps steam from the dough, keeping the crust flexible for maximum “oven spring” in the first 20 minutes.
-
Bake Uncovered: Remove the lid, reduce oven temperature to 450°F (230°C), and bake for another 25-30 minutes. This is where the magic happens: the crust dries out and transforms into a dark, crackling, rustically blistered shell. Bake until it’s a deep chestnut brown; color is flavor.
-
The Knock Test: The loaf is done when its internal temperature is 208-210°F and it sounds hollow when thumped on the bottom.
-
The Hardest Part: Cool on a wire rack for at least 2 hours. Cutting open a steaming loaf is tempting, but it will be gummy inside. The cooling completes the starch gelatinization.
Troubleshooting the Rustic Unloaf
-
Flat, Spread-Out Loaf? Your dough was over-proofed or your final shaping didn’t have enough surface tension.
-
Dense, No Holes? Under-proofed during bulk fermentation, or your starter wasn’t strong enough.
-
Pale, Soft Crust? Bake darker. You didn’t preheat long enough, or you need to uncover it sooner to let the moisture escape.
Enjoy the process. The crackle of a naturally fermented, unloafed sourdough fresh from the oven is one of the most satisfying sounds in a kitchen.