
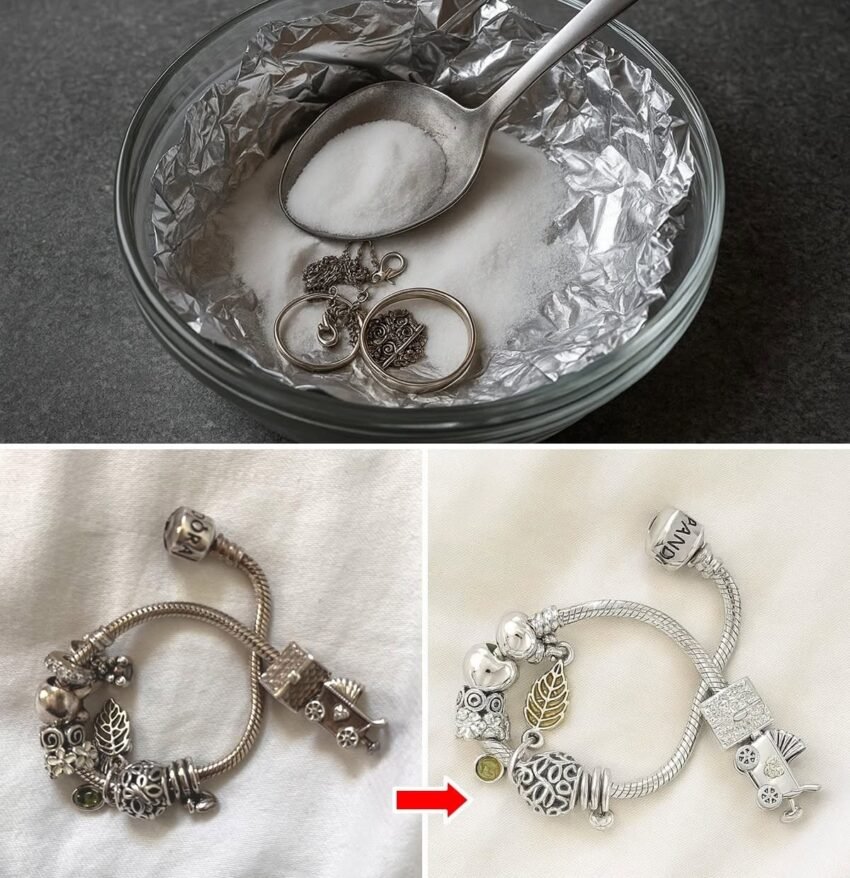
arnished silver can be brought back to life, but the method you choose depends on whether the piece is solid silver, silver-plated, or contains gemstones. Here is a guide from gentlest to most heavy-duty.
Important First Step: Determine if your piece is solid silver or silver-plated. If it is only silver-plated, avoid abrasive polishes or dips too often, as you can wear through the silver layer to the base metal underneath.
1. The Gentle Soap and Water Method
Best for: Light tarnish, jewelry with soft gemstones (pearls, opals, turquoise), or pieces with antique patina you want to preserve.
-
Mix a few drops of mild dish soap (like Dawn) with warm water.
-
Soak the silver for a few minutes.
-
Gently rub with a soft, lint-free microfiber cloth or a very soft baby toothbrush.
-
Rinse under warm water and dry thoroughly with a soft cloth.
2. The Baking Soda and Aluminum Foil Method (The Chemical Dip)
Best for: Heavy black tarnish on solid silver. Do not use this on antique silver, oxidized silver, or jewelry with porous gemstones or glued-in stones.
This uses a mild electrolysis reaction to transfer the sulfur (tarnish) from the silver to the aluminum foil. It is highly effective and requires no scrubbing.
-
Line a glass or plastic bowl with aluminum foil (shiny side up).
-
Place the silver items on the foil, ensuring they are touching the foil.
-
Sprinkle 2–3 tablespoons of baking soda and 2–3 tablespoons of table salt over the items.
-
Pour boiling water over the items until they are completely submerged. You will smell a slight “rotten egg” smell (sulfur); this is normal.
-
Let it sit for 5–10 minutes. The tarnish will visibly lift off.
-
Remove with tongs (it will be hot), rinse well, and buff dry with a soft cloth.
3. Commercial Silver Polish (Liquid, Paste, or Wipes)
Best for: General deep cleaning and achieving a high shine. Safe for most solid silver.
Brands like Wright’s Silver Cream, Hagerty, or Weiman are excellent.
-
Apply a small amount of polish to a soft sponge or microfiber cloth.
-
Rub the silver in a straight back-and-forth motion (not circles, which can create micro-scratches).
-
You will see the cloth turn black—that means it’s working.
-
Rinse the item in warm water to remove the polish residue from crevices.
-
Buff vigorously with a clean, dry microfiber cloth to bring out the shine.
4. Toothpaste (The DIY Abrasive)
Best for: In a pinch if you have no silver polish.
-
Use plain white toothpaste (not gel).
-
Apply a small dab to a damp cloth or soft toothbrush.
-
Gently rub the silver, rinse thoroughly, and dry.
-
Warning: Toothpaste is slightly abrasive. Do not use this on highly polished, delicate, or silver-plated pieces.
5. Heavy-Duty Silver Dips (Liquid)
Best for: Intricate filigree or silverware with deep crevices that you cannot reach with a cloth.
-
Follow the instructions on the bottle (e.g., Hagerty Silver Dip or Tarn-X).
-
Dip the item for only 10–20 seconds—do not leave it in too long, as it can etch the metal.
-
Rinse immediately and thoroughly with water, then wash with soap and water.
What NOT to Do
-
Do not use chlorine bleach: It corrodes silver permanently.
-
Do not put silver in the dishwasher: The heat and harsh detergents will permanently dull and pit the metal.
-
Do not use abrasive scrubbers: Steel wool or harsh green scrub pads will leave deep scratches.
-
Antique Patina: If your silver has intentional black detailing in the crevices (often called “oxidized” or “patina”), polishing it away will lower its value. Stick to gentle soap and water only.
How to Keep It from Tarnishing Again
Silver tarnishes due to a reaction with sulfur in the air, humidity, and contact with skin oils, perfume, or rubber.
-
Wash after wearing: Wipe jewelry with a soft cloth before putting it away.
-
Anti-tarnish strips: Place 3M Anti-Tarnish strips or chalk in your jewelry box. They absorb the sulfur in the air.
-
Storage: Store silver in airtight zip-lock bags. Squeeze the air out to slow down oxidation.
-
Silica gel packets: Toss a few in your jewelry box to absorb moisture.