Rustic No-Knead Rosemary Garlic Bread: The Easiest Artisan Loaf You’ll Ever Make
There is something magical about pulling a golden, crusty, bakery-style loaf of bread out of your own oven. The smell alone is enough to make your entire house feel like a French countryside boulangerie. And here’s the best part: you don’t need years of baking experience, a stand mixer, or even much effort.
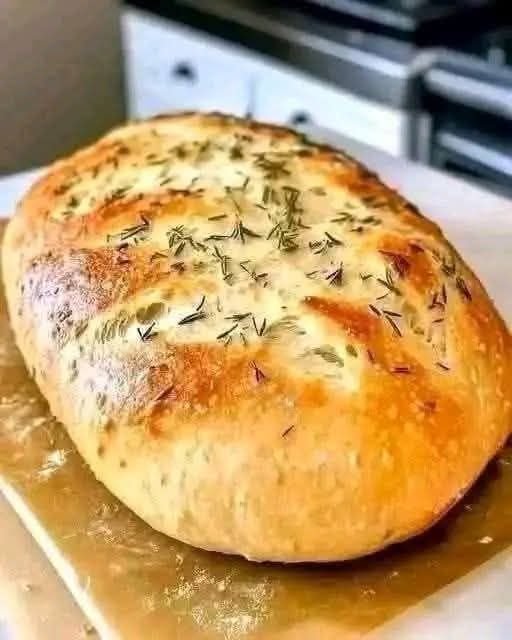
This No-Knead Rosemary Garlic Bread is the loaf that will make you feel like a professional baker. With just a little patience (and almost no work), you get a crusty exterior, an airy, chewy interior, and the aromatic flavors of garlic and fresh rosemary running through every single bite.
The Secret: Time Does the Work
Traditional bread requires kneading to develop gluten. This recipe skips all that elbow grease. Instead, a long, slow fermentation (12-24 hours) allows the gluten to develop naturally, creating that signature open crumb and complex flavor without you lifting a finger.
Why You’ll Love This Bread
-
No Kneading Required: Literally zero arm workout. Just stir and wait.
-
Minimal Hands-On Time: About 10 minutes of active work. The rest is letting the magic happen.
-
Incredible Flavor: The garlic and rosemary infuse the dough, making it perfect for dipping in olive oil, serving with soup, or making the ultimate sandwich.
-
That Bakery Crust: Baking it in a covered Dutch oven creates steam, giving you that shatteringly crisp crust.
The Recipe
-
Ingredients:
-
3 cups (375g) all-purpose or bread flour
-
1 3/4 teaspoons salt
-
1/2 teaspoon active dry or instant yeast
-
1 1/2 cups (355ml) warm water
-
3 cloves garlic, minced (or sliced thinly for milder pockets of flavor)
-
2 tablespoons fresh rosemary, finely chopped (plus a little extra for topping)
-
Optional: Flaky sea salt for finishing
-
-
Instructions:
-
Mix the Dough (Day 1, 5 minutes): In a large mixing bowl, whisk together the flour, salt, and yeast. Add the warm water, minced garlic, and chopped rosemary. Use a wooden spoon or your hand to mix until a shaggy, sticky dough forms and no dry flour remains. It will look messy—that’s perfect. Do not knead.
-
The Long Wait (Day 1, 12-18 hours): Cover the bowl tightly with plastic wrap or a clean kitchen towel. Let it sit at room temperature for 12 to 18 hours. Overnight is ideal. The dough will bubble up, double in size, and have a wonderfully fermented, yeasty smell.
-
Shape the Dough (Day 2, 2 minutes): Lightly flour a work surface. The dough will be very sticky and wet. Gently scrape it out of the bowl onto the floured surface. With floured hands, gently fold the edges of the dough over itself a few times to form a rough ball. Don’t overwork it.
-
The Second Rise (Day 2, 1-2 hours): Place a large piece of parchment paper on your work surface and dust it lightly with flour. Gently transfer the dough ball to the parchment. Sprinkle the top with a little more flour and a few extra rosemary leaves. Cover it loosely with another kitchen towel and let it rest for about 1-2 hours, until it looks slightly puffy.
-
Preheat the Dutch Oven (Day 2, 30 minutes before baking): About 30 minutes before your dough is done rising, place a heavy Dutch oven (or any large oven-safe pot with a lid) inside your oven. Preheat the oven to 450°F (230°C). Getting the pot screaming hot is key to the crust.
-
Bake (Day 2, 30-35 minutes): Carefully remove the scorching hot Dutch oven from the oven. Using the parchment paper as a sling, lift the dough and lower it gently into the pot. (Be careful not to touch the sides!). Cover with the lid and return to the oven.
-
Steam and Finish: Bake covered for 30 minutes. This traps steam and creates the crust. After 30 minutes, remove the lid. The bread should be golden. Bake uncovered for another 5-10 minutes until the crust is deep golden brown and crispy. If you want a garlic topping, you can brush the crust with melted garlic butter as soon as it comes out.
-
Cool (The Hardest Part): Transfer the bread to a wire rack and let it cool for at least 30 minutes before slicing. This is crucial—if you cut too early, the inside will be gummy. Use this time to inhale the incredible aroma.
-
Serving Suggestions
-
Serve warm alongside that Crustless Pizza Bowl for dipping in the sauce.
-
Use it to make the ultimate garlic bread by slicing, buttering, and toasting.
-
Dip thick slices in olive oil and balsamic vinegar with a sprinkle of salt.
-
Pair with a hearty bowl of soup or stew.
This bread tastes like something from a fancy bakery, but you made it. With almost no work. That’s the real magic