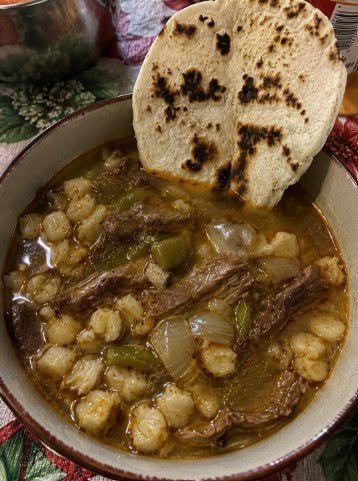
Frijoles de la Olla (literally “pot beans”) is the soul of Mexican home cooking—a simple, humble dish that, when made with care, is profoundly delicious. It’s not just a recipe; it’s a staple that fills the house with an incredible, comforting aroma.
Here is the authentic way to make a perfect pot of pinto beans, focusing on the traditional Mexican method.
The Philosophy: Simplicity and Patience
The magic of frijoles de la olla comes from just a few simple ingredients, treated with respect and given time. There are no shortcuts, but the active work is minimal. The beans are not just a side dish; the rich, savory broth is as important as the beans themselves.
Authentic Frijoles de la Olla Recipe
Yield: About 6 cups of beans with broth
Time: 2-3 hours (almost entirely hands-off)
Ingredients
-
1 pound (about 2 ½ cups) dried pinto beans: Look for beans that are as fresh as possible. Older beans take longer to cook and don’t get as creamy.
-
Water: Filtered water is best if your tap water is very hard, as minerals can prevent beans from softening.
-
¼ of a medium white onion: Leave the root end intact so the piece stays together.
-
2-3 cloves garlic, peeled
-
2 sprigs of fresh epazote (optional, but authentic): This is a classic herb in Mexican bean cooking. It adds a distinctive, slightly minty-oregano-piney flavor and is traditionally used to help reduce the beans’ gaseousness.
-
1 tablespoon high-quality lard or mild-flavored oil: Lard is deeply traditional and adds an irreplaceable savory richness and silky mouthfeel. Avocado oil is a good neutral substitute.
-
Kosher salt or sea salt
Instructions: The Traditional “Olla” Method
1. Clean and Inspect the Beans
Spread the dried beans on a clean countertop or sheet pan. Pick through them carefully, removing any small stones, clumps of dirt, or shriveled, broken beans. Rinse them thoroughly in a colander under cold water.
2. The Initial Boil (The “Susto”)
This is a key step for authentic texture and digestibility.
-
Place the rinsed beans in a large, heavy-bottomed pot (a ceramic or enameled cast-iron “olla” is traditional, but a Dutch oven works perfectly).
-
Pour enough cold water to cover the beans by at least 3 inches. Bring to a rolling boil over high heat and boil for 2-3 minutes.
-
Remove the pot from the heat, cover, and let the beans soak in the hot water for 1 hour. This is the quick-soak method, which is traditional and more effective than an overnight cold soak for creamy beans with tender skins. Drain and discard this soaking water.
3. The Gentle Simmer
-
Return the soaked and drained beans to the pot. Add fresh, cold water to cover them by about 2 inches (roughly 6-8 cups, but use your eye).
-
Add the onion quarter, garlic cloves, and epazote sprigs (if using).
-
Bring the water to a gentle boil over medium-high heat, then immediately reduce the heat to low. You want the barest, most gentle simmer—the surface of the water should just tremble with a few small bubbles. A rolling boil will break the beans and make them tough.
-
Partially cover the pot with a lid, leaving a crack open.
4. The Long, Slow Transformation
-
Simmer the beans gently for 1.5 to 2 hours. The total time will depend on the age of your beans. Do not stir them vigorously; a gentle shake of the pot is better.
-
The Critical Rule: Do NOT add salt yet. Adding salt too early can make the skins tough and prevent the interior from becoming creamy.
5. When to Add Salt and Fat
-
The beans are ready for this step when you can easily smoosh a bean against the side of the pot with a wooden spoon, and the skin is tender, not tough. The broth should be turning a murky, rich brown.
-
Now, stir in the lard (or oil) and a generous amount of salt. Start with 1.5 teaspoons of kosher salt. The broth should taste well-seasoned and savory.
-
Continue to simmer very gently, with the lid partially off, for another 20-30 minutes. The broth will reduce slightly and become even more flavorful and slightly viscous. The beans will be perfectly creamy and intact.
6. Rest and Serve
-
Remove the pot from the heat. Fish out and discard the spent onion quarter, garlic cloves, and epazote stems.
-
Let the beans rest in their hot broth for at least 15-20 minutes before serving. Like many stews, they are even better the next day.
How to Serve Frijoles de la Olla
This is a versatile, multi-day dish. Serve it in stages:
-
Day 1: In Their Broth (Caldo de Frijol)
Ladle the beans into bowls with a generous amount of their savory broth. Top with raw, finely diced white onion, fresh cilantro, and a squeeze of lime juice. Eat with warm corn tortillas for a simple, perfect meal. -
Day 2: Refried Beans (Frijoles Refritos)
Using a slotted spoon, take out the amount of beans you want and fry them in a hot skillet with more lard, mashing them to your desired consistency. Add a little of the reserved bean broth to get the perfect creamy texture. -
Any Day: Mashed Bean Spread
Drain some beans, mash them slightly with a fork, and spread them on a toasted bolillo or inside a quesadilla. Top with crumbled queso fresco.
The final pot of frijoles de la olla is more than just cooked beans. It’s creamy, tender beans in a deeply savory, soul-warming broth that speaks to centuries of Mexican culinary wisdom. It’s comfort in a bowl.