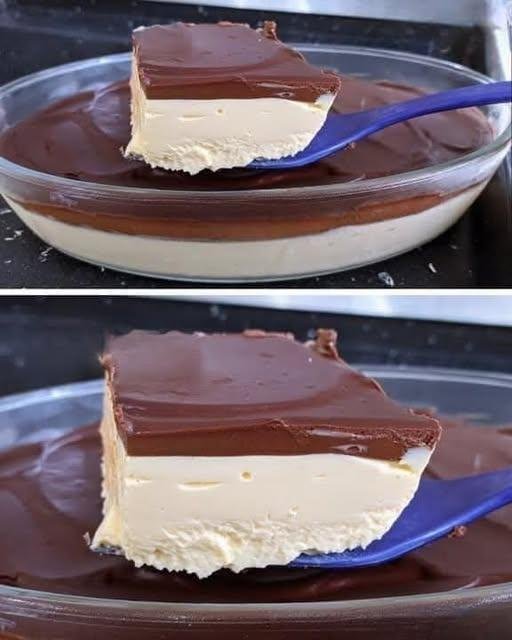
Here’s a recipe for incredibly smooth, rich No-Bake Chocolate Silk Bars—like a French silk pie but in a simple, sliceable bar form, with absolutely no oven time.
No-Bake Chocolate Silk Bars
*Makes one 20cm (8-inch) square pan, about 16 bars*
The Layers
1. Chocolate Cookie Crust
2. Chocolate Silk Filling
3. Whipped Cream Topping (optional, but recommended)
Part 1: The Crust
Ingredients
-
200g (2 cups) chocolate cookie crumbs (Oreos with filling removed, or plain chocolate digestive biscuits/cookies)
-
85g (6 tbsp) unsalted butter, melted
-
1 tbsp granulated sugar (if using unsweetened cookies)
Instructions
-
Line an 20cm (8-inch) square baking tin with parchment paper, leaving overhang for easy lifting.
-
Crush the biscuits into fine crumbs using a food processor or a rolling pin and zip-top bag.
-
Mix the crumbs, melted butter, and sugar until it resembles wet sand.
-
Press firmly and evenly into the bottom of the prepared tin. Use the flat bottom of a glass to compact it tightly.
-
Refrigerate while you make the filling.
Part 2: The Chocolate Silk Filling
This is the heart of the recipe. It’s essentially a cooked mousse without eggs (or with pasteurized eggs if you choose the traditional route). I’m giving you the safe, no-raw-egg version that delivers the same silky texture.
Ingredients
-
200g (7 oz) dark chocolate (60-70% cocoa), finely chopped
-
120ml (1/2 cup) heavy cream (for melting chocolate)
-
60g (1/4 cup) unsalted butter, softened to room temperature, cut into pieces
-
60g (1/4 cup) caster/granulated sugar
-
2 tbsp cocoa powder, sifted
-
1 tsp vanilla extract
-
Pinch of flaky sea salt
-
240ml (1 cup) cold heavy cream (for whipping)
Instructions
-
Melt the chocolate: Place the chopped dark chocolate, 120ml cream, sugar, cocoa powder, and salt in a heatproof bowl over a pan of barely simmering water (double boiler). Stir gently until melted and completely smooth. Do not let the bowl touch the water.
-
Add butter: Remove from heat and stir in the softened butter, one piece at a time, until fully incorporated. Stir in the vanilla. Let this mixture cool to room temperature—it should be fluid but not warm. If you rush this, it will seize the cold cream in the next step.
-
Whip the cream: In a separate large bowl, whip the 240ml of cold heavy cream to soft peaks. You want it billowy and holding its shape but not stiff or grainy.
-
Fold together: Gently fold the cooled chocolate mixture into the whipped cream in three additions. Use a light hand—the first addition will deflate a bit, but by the third, you should have a uniform, mousse-like filling that is airy but rich.
-
Set: Pour the filling over the chilled crust. Smooth the top with a spatula. Cover and refrigerate for at least 6 hours, ideally overnight. The filling needs time to set firmly so it slices cleanly.
Part 3: The Topping & Serving
Ingredients
-
240ml (1 cup) cold heavy cream
-
2 tbsp icing/powdered sugar
-
1/2 tsp vanilla extract
-
Dark chocolate shavings or cocoa powder, for garnish
Instructions
-
Just before serving, whip the cream with the icing sugar and vanilla to soft peaks.
-
Lift the set slab out of the tin using the parchment. Place on a cutting board.
-
Spread or pipe the whipped cream over the top. Shower with dark chocolate shavings or a light dusting of cocoa.
-
For the cleanest slices: Dip a sharp knife in hot water, wipe dry, and slice. Repeat between each cut.
Tips & Variations
-
Coffee Boost: Add 1 tsp of instant espresso powder to the melted chocolate mixture. It deepens the chocolate flavor without tasting like coffee.
-
Boozy Version: Replace 1 tbsp of the melting cream with dark rum, brandy, or orange liqueur. Add it with the vanilla.
-
Salted Caramel: Swirl 3-4 tbsp of thick salted caramel sauce through the filling before it sets for a marbled effect.
-
Storage: These bars freeze beautifully without the whipped cream topping. Wrap individual slices tightly and freeze for up to 2 months. Thaw in the fridge overnight.
They’re intensely chocolatey, melt-in-the-mouth silky, and deceptively easy for something that tastes so luxurious. Let me know if you’d like to adapt the recipe to a different pan size.