Deviled eggs are a classic for a reason—they’re creamy, tangy, and always a hit. This recipe will give you a perfect, classic version, plus some fun variations to try.
The key to great deviled eggs is a smooth, flavorful filling and a stable way to present them.
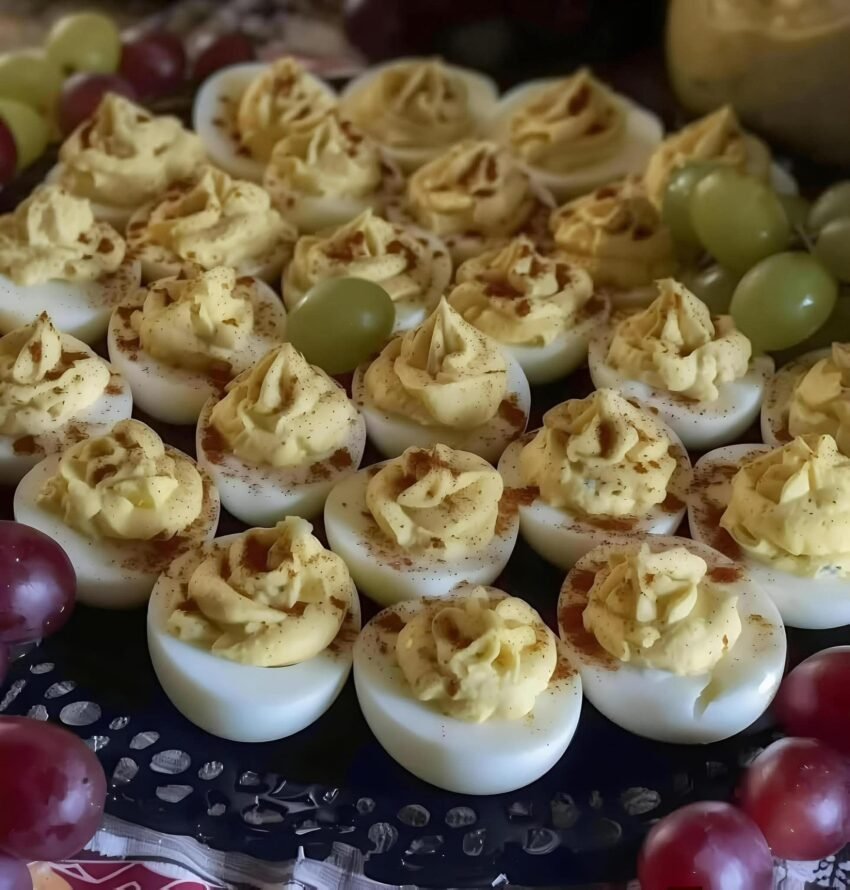
Classic Deviled Eggs
This recipe is the perfect starting point. It’s simple, delicious, and everyone loves it.
Ingredients:
-
6 large eggs
-
3 tablespoons mayonnaise (Hellmann’s/Best Foods is a classic choice)
-
1 teaspoon yellow mustard (or Dijon for a slightly different tang)
-
1 teaspoon white vinegar (or apple cider vinegar)
-
Salt and freshly ground black pepper, to taste
-
Paprika, for garnish (sweet or smoked)
Equipment:
-
Medium saucepan
-
Bowl of ice water
-
Mixing bowl
-
Fork or potato masher
-
Spoon or piping bag (with a tip)
Instructions:
-
Hard Boil the Eggs (The Most Important Step):
-
Place the eggs in a single layer in a saucepan and cover with cold water by about an inch.
-
Bring the water to a rolling boil over high heat.
-
Once boiling, turn off the heat, cover the pot, and let it sit for 10-12 minutes. (12 minutes for large eggs guarantees fully set yolks).
-
Immediately transfer the eggs to an ice water bath. Let them sit for at least 5 minutes to stop the cooking process and make them easier to peel.
-
-
Peel and Prep:
-
Gently crack the eggs all over and peel them under cool running water. This helps separate the shell from the egg.
-
Slice each egg in half lengthwise.
-
Carefully pop out the yolks and place them in a mixing bowl. Arrange the hollowed-out egg whites on a serving platter.
-
-
Make the Filling:
-
Using a fork, mash the yolks into a fine crumb. You want no large lumps.
-
Add the mayonnaise, mustard, and vinegar. Mix until completely smooth and creamy. Season with salt and pepper. Taste and adjust—you might want a little more mustard or a pinch more salt.
-
-
Fill the Eggs:
-
You can simply spoon the filling back into the egg whites. For a nicer, more professional look, spoon the filling into a piping bag (or a zip-top bag with the corner snipped off) and pipe it in. A star tip creates a classic, decorative swirl.
-
-
Garnish and Chill:
-
Sprinkle a light dusting of paprika over the filled eggs for a pop of color and a hint of flavor.
-
Cover and refrigerate for at least 30 minutes before serving. This allows the flavors to meld and the filling to firm up.
-
Fun Variations
Once you’ve mastered the classic, here are some delicious twists to try.
1. Spicy Sriracha Deviled Eggs
-
Filling: Add 1-2 teaspoons of sriracha (to taste) to the classic yolk mixture.
-
Garnish: Sprinkle with sliced fresh chives and a tiny drizzle of sriracha on top.
2. Bacon & Cheddar Deviled Eggs
-
Filling: Add 2 tablespoons of finely shredded sharp cheddar cheese to the classic yolk mixture.
-
Garnish: Top with crumbled crispy bacon and a slice of fresh chive.
3. Guacamole Deviled Eggs
-
Filling: Mash 1 ripe avocado with the egg yolks. Omit the mustard and vinegar, and use lime juice instead. Add a pinch of cumin and chopped cilantro.
-
Garnish: Top with a small piece of fresh tomato or a cilantro leaf.
4. Dill Pickle Deviled Eggs
-
Filling: Finely chop 1-2 tablespoons of dill pickles. Add them to the classic yolk mixture along with a teaspoon of the pickle juice (instead of the vinegar).
-
Garnish: Sprinkle with fresh or dried dill.
Tips for Perfect Deviled Eggs Every Time
-
Use Older Eggs: Slightly older eggs (a week or two old) are much easier to peel than farm-fresh eggs.
-
Don’t Overcook: Overcooking leads to a greenish-gray ring around the yolk and a sulfurous smell. The 10-12 minute off-heat method is very reliable.
-
Make it Smooth: For the silkiest filling, push the cooked yolks through a fine-mesh sieve before mixing. It takes a little extra time but makes a big difference.
-
Stability: If your egg whites won’t sit flat on the platter, simply slice a tiny sliver off the rounded bottom of each white half to create a flat base.
-
Make Ahead: You can boil and peel the eggs up to 2 days in advance. You can make the filling up to 2 days in advance (store it in a piping bag in the fridge). Assemble them no more than a few hours before serving for the best presentation.