Aloe Vera Oil—what it is, how to make it at home, its benefits, and how to use it.
First, a crucial clarification: In the strict chemical sense, there is no such thing as pure “aloe vera oil.” Aloe vera is over 99% water and does not contain natural oils that can be pressed from the plant like olive oil or coconut oil.
What we call “Aloe Vera Oil” is a macerated or infused oil. This means the beneficial compounds from the aloe vera leaf are extracted and carried into a stable carrier oil. The water evaporates during the process, leaving the oil-soluble healing components behind. This creates a potent, shelf-stable, and deeply moisturizing product that combines the properties of aloe with the chosen carrier oil.
Why Make or Use Aloe Vera Oil?
Combining aloe vera with an oil marries two powerhouse benefits into one product:
-
Aloe Vera: Soothing, anti-inflammatory, deeply hydrating (via water), packed with vitamins, enzymes, and amino acids that help repair skin.
-
Carrier Oil: Locks in moisture, nourishes with fatty acids, and improves skin barrier function.
The result is an oil that is exceptionally soothing for irritated skin but without the heavy, greasy feel of some straight oils. It absorbs beautifully.
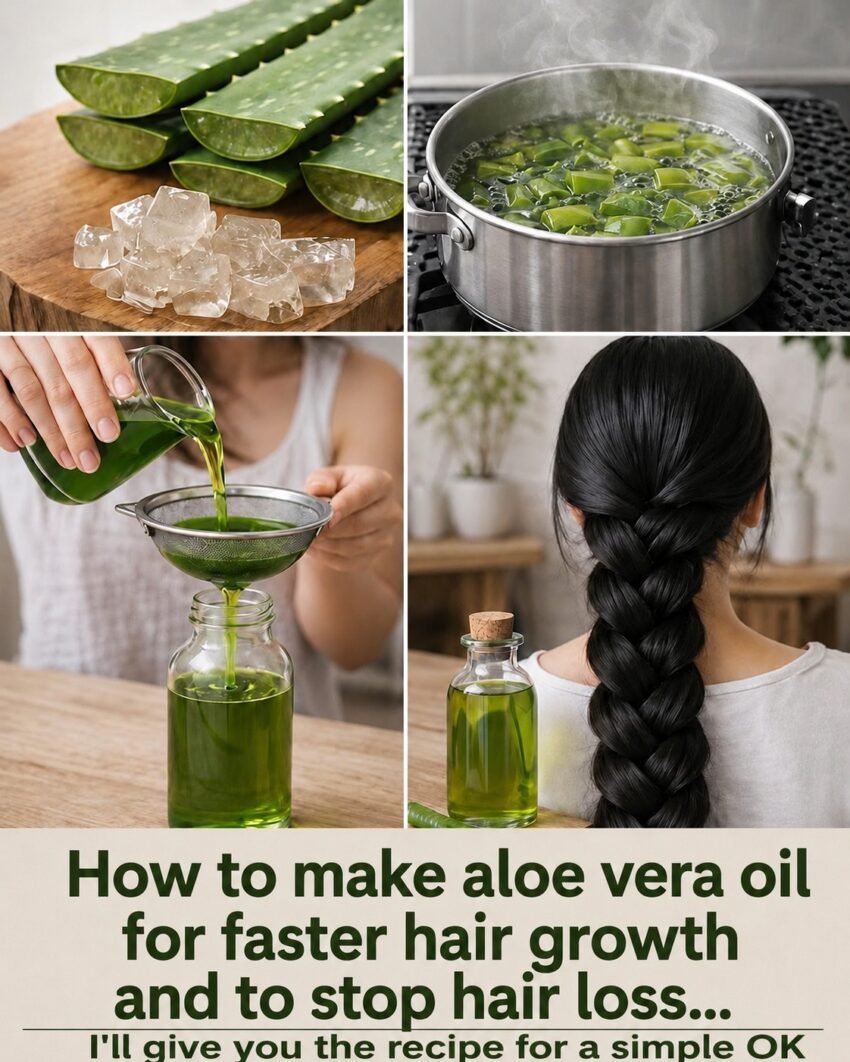
DIY Recipe: How to Make Aloe Vera Oil at Home
The process uses heat to force the water out of the aloe gel and infuse its healing properties into the oil. Patience is key; making a truly stable, long-lasting aloe oil is a slow process.
Two Methods: Fresh Leaf (Traditional) vs. Quick Infusion (Using Store-Bought Gel)
Method A: The Traditional Slow Infusion (Best for Fresh Leaves)
This method yields the most authentic, potent oil.
Ingredients
-
1 large, mature Aloe Vera leaf (or 2-3 small ones)
-
1 cup of a stable carrier oil (Fractionated Coconut Oil/MCT oil is the gold standard because it’s incredibly stable, odorless, and has a long shelf life. Alternatives: Jojoba oil, Sweet Almond oil, or Grapeseed oil.)
-
Optional: A few drops of Vitamin E oil (a natural preservative and antioxidant)
Equipment
-
Sharp knife and spoon
-
Blender
-
Double boiler (or a heatproof glass bowl set over a pot of simmering water)
-
Fine mesh strainer or cheesecloth
-
A clean, sterilized glass jar for storage
Instructions
-
Prepare the Aloe Leaf: Wash the leaf thoroughly. Cut off the spiky edges lengthwise. Stand the leaf upright (cut end down) in a glass for 15-20 minutes to allow the yellow aloin latex to drain out. This latex is a potent laxative and skin irritant for some people.
-
Extract the Gel: Using a sharp knife, carefully fillet off the green outer skin. Scoop out the clear inner gel with a spoon. You’ll need about 1/2 cup of fresh gel.
-
Blend Gel and Oil: Place the fresh aloe gel in a blender with your 1 cup of carrier oil. Blend on high for 1-2 minutes until the mixture is a smooth, thick emulsion. It will look like a milky green smoothie.
-
Gently Apply Heat (The Water Evaporation Phase): Pour the emulsion into the top of a double boiler. Heat it over very low, gently simmering water. Do not let the oil boil or fry; you want a temperature around 170-200°F (75-95°C). This is the most critical phase. The water from the aloe will begin to separate and eventually evaporate. You’ll see bubbles and hear a sizzling/crackling sound. Stir occasionally. This process can take 45 minutes to 2 hours, depending on how much water was in your gel. The oil is ready when it becomes completely still and silent. There will be no more crackling sounds (that’s the last of the water content vaporizing). The aloe solids will have browned and settled on the bottom.
-
Strain: Remove from heat and let it cool slightly. Line your fine-mesh strainer with several layers of cheesecloth and strain the oil into your clean, dry glass jar. Squeeze the cloth to extract every last drop. The oil should be a beautiful light golden-green color, and entirely clear, not cloudy. Cloudiness indicates residual water, which will cause mold.
-
Add Vitamin E (Optional): Stir in a few drops of Vitamin E oil to extend the shelf life.
-
Store: Seal the jar tightly and store in a cool, dark place. Properly made, it can last 6-12 months.
Method B: The Quick Pantry Infusion (Foolproof)
This method uses a store-bought oil-based aloe extract, which is commercially prepared to be oil-soluble, completely bypassing the tricky water-removal step. It’s the safest way to a shelf-stable product.
Ingredients
-
1 teaspoon Aloe Vera Extract (Oil Soluble) – Available online or in specialty cosmetic ingredient shops. Make sure it says “oil soluble” or “lipid soluble.”
-
1/2 cup of your favorite carrier oil (Jojoba, Argan, Sweet Almond, etc.)
Instructions
-
Simply mix the aloe vera extract into the carrier oil in a clean glass bottle.
-
Shake vigorously for a minute to combine.
-
It’s ready to use immediately and has the shelf life of the carrier oil. This is perfect for facial oils.
Benefits and Uses of Aloe Vera Oil
This infused oil is a multitasking powerhouse for skin, hair, and scalp:
| Use | How It Helps |
|---|---|
| After-Sun or Burn Care | Combines the cooling, anti-inflammatory action of aloe with the deep moisturizing and barrier-repair of the oil. Excellent for peeling skin. |
| Daily Facial Oil / Moisturizer | Absorbs faster than plain oil. Perfect for dehydrated, sensitive, or mature skin. Apply a few drops to a damp face. |
| Dry Scalp & Dandruff Treatment | Massage into the scalp 30 minutes before showering. It soothes itching and flakes while moisturizing, without being as greasy as plain coconut oil. |
| Hair Frizz Control & Shine | Rub a single drop between your palms and smooth over hair ends. It tames flyaways and adds a healthy gloss without weighing hair down. |
| Skin Irritations (Eczema/Psoriasis) | Its powerful soothing properties help calm redness and itching associated with dry, flaky skin conditions. |
| Shaving Oil | Provides a slick, protective surface for a razor while the aloe prevents razor burn. |
| Makeup Remover | Gently dissolves makeup and sunscreen while soothing the delicate skin around the eyes. |
Safety and Storage
-
Shelf Life: The biggest enemy of homemade aloe oil is water. If your oil ever turns cloudy, develops a foul smell, or you see mold, discard it immediately. The Water Evaporation Phase in Method A must be complete.
-
Allergy Test: Always do a small patch test on your inner arm before widespread use, especially if you have sensitive skin.
-
Not for Sunburn Alone: Do not apply a heavy, pure oil to a fresh, hot sunburn. The oil can trap heat and worsen the burn initially. Use straight aloe gel first, and then switch to aloe vera oil during the peeling/dryness phase that follows a few days later.
Enjoy creating your own personalized, soothing skincare potion. Let me know if you need help sourcing the oil-soluble aloe extract or have any other questions!