This is a satisfying, practical pivot—from immunity remedies to making your bathroom sparkle. A clean, powerful toilet flush doesn’t just look better; it prevents odors and keeps things running efficiently. Here’s a thorough, step-by-step guide to deep-clean your entire toilet flush system—tank, bowl, rim jets, and all—so it looks and works like new.
How to Clean Your Toilet Flush & Make It Look Like New
A complete deep-clean for the handle, tank, rim jets, siphon jet, and bowl to restore a powerful, fresh flush.
What You’ll Need
-
White vinegar (at least 2 cups)
-
Baking soda
-
A sturdy toilet brush
-
A small stiff-bristled brush (an old toothbrush or grout cleaning brush)
-
A small mirror (compact mirror or dental mirror—great for seeing under the rim)
-
Duct tape
-
A flathead screwdriver (optional, for the tank lid)
-
Rubber gloves
-
Paper towels or a rag
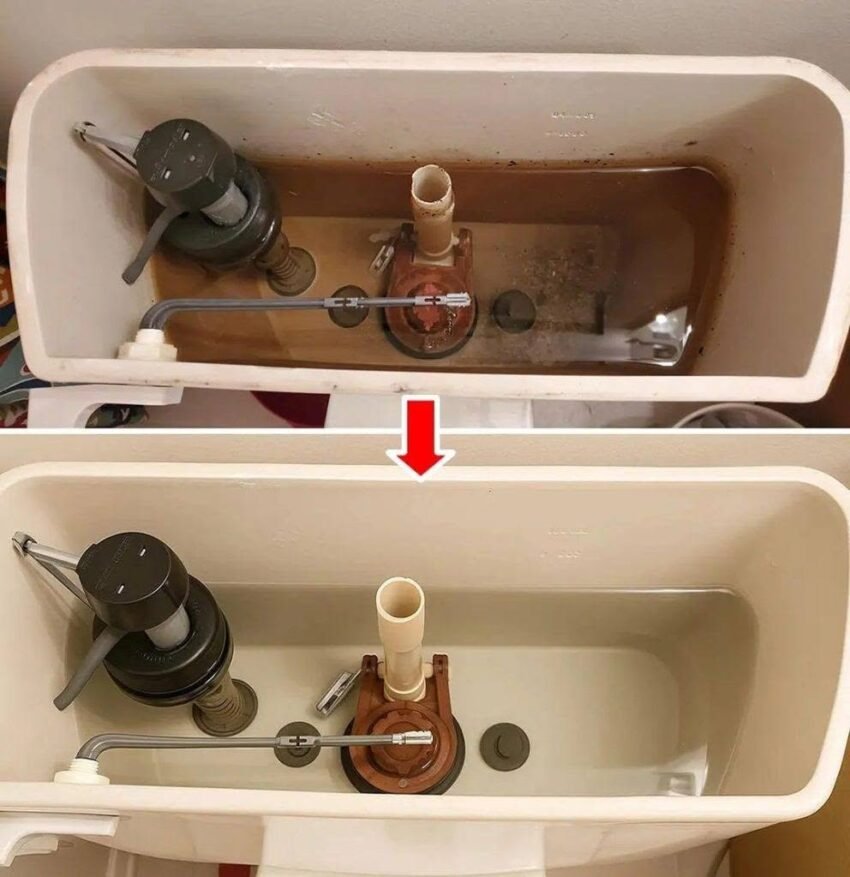
Phase 1: Clean the Tank (The Hidden Half)
Mineral deposits, mold, and debris in the tank make your flush weak and your bowl dirty.
-
Shut off the water: Locate the water valve behind the toilet (where the pipe meets the wall). Turn it clockwise until it stops.
-
Empty the tank: Flush the toilet and hold the handle down until as much water as possible drains from the tank. You’ll be left with a small amount at the very bottom.
-
Pour in vinegar: Pour 2 cups of white vinegar into the tank. Pour some directly onto the walls of the tank to coat any visible mineral scale or rust. Let it sit for 15–20 minutes. Do not use bleach, especially if you have a septic system or use drop-in bowl cleaners. Vinegar is safe for the rubber flapper and gaskets.
-
Scrub the tank interior: Dip your stiff brush (never use the toilet bowl brush; keep it separate) into the vinegar-water and scrub the walls, the bottom, and the float mechanism gently to loosen any scale or biofilm.
-
Turn the water back on and let the tank refill. Flush once or twice to rinse the vinegar through.
Phase 2: Unclog the Rim Jets (Restoring the Swirl)
Those little holes under the rim direct water in a circular motion. When clogged, the toilet flushes straight down weakly instead of swirling to clean the bowl.
-
Locate the rim jets: Use your small mirror to look under the lip of the toilet bowl. You’ll see a ring of small holes.
-
Apply vinegar paste: Mix baking soda with a little white vinegar to make a thick paste. Smear this paste generously under the rim, directly over the jets.
-
Let it fizz and work: Let the paste sit for 10–15 minutes. The fizzing action helps break down the hard water deposits blocking the holes.
-
Scour each jet: Use the tip of a small stiff brush, an old toothbrush, or a piece of stiff wire (a cut coat hanger works in extreme cases) to gently poke and clear each individual jet hole. Be careful not to scratch the porcelain; the deposits are usually just mineral buildup.
-
Flush and test: Flush the toilet and watch the water flow. It should now swirl forcefully again.
Phase 3: Deep-Clean the Siphon Jet (The Power Jet)
This is a larger opening, usually at the bottom of the bowl opposite the drain. It’s the “turbo boost” that starts the siphoning action. If it’s clogged, your toilet flushes slowly.
-
Drain the bowl: Push water from the bowl into the trapway with quick, short shoves of the toilet brush, or use a small cup to bail out most of the water. You want the water level low enough to expose the siphon jet hole.
-
Soak with vinegar: Stuff a paper towel soaked in white vinegar directly into the siphon jet opening. Let it sit for 15 minutes.
-
Scrub and clear: Remove the paper towel and scrub the hole aggressively with your stiff brush. Flush to test. You should see a strong, clear jet of water shooting into the trapway.
Phase 4: Make the Bowl Look Like New
For the final, showroom shine.
-
Baking soda scrub: Sprinkle a generous amount of baking soda all over the inside of the bowl.
-
Vinegar flush: Pour about 1 cup of white vinegar over the baking soda. It will fizz up immediately. While it’s fizzing, scrub the entire bowl thoroughly with your toilet brush, getting up under the rim.
-
Address stubborn stains: If there’s a mineral ring at the waterline (often brown or gray), scrub it with a pumice stone. Wet the stone and the toilet first, then gently rub the stain. It works like magic on hard water rings without scratching the porcelain.
-
Final wipe-down: Let the vinegar solution sit for 5 minutes, then flush. While the exterior is still clean, spritz the outside of the toilet, the seat, the lid, and the handle with a final spray of straight white vinegar or your preferred disinfectant. Wipe dry with a clean rag.
Maintenance Tips to Keep It That Way
-
Monthly Jet Check: Pour 1 cup of white vinegar into the overflow tube inside the tank (the open pipe in the middle). This sends vinegar straight to the rim jets to prevent clogs before they start.
-
Don’t Use In-Tank Bleach Tablets: These corrode the rubber flapper and gaskets, causing phantom flushes and leaks. They also create a sticky film that gums up the jets.
-
Always Close the Lid Before Flushing: This isn’t just about cleanliness—it’s about preventing the aerosolized plume from spreading germs around your bathroom.
This is the ultimate non-toxic, effective way to restore a sluggish toilet to its full, swirling glory. Let me know if you run into a specific issue, like a persistent ring or a toilet that runs constantly after cleaning.