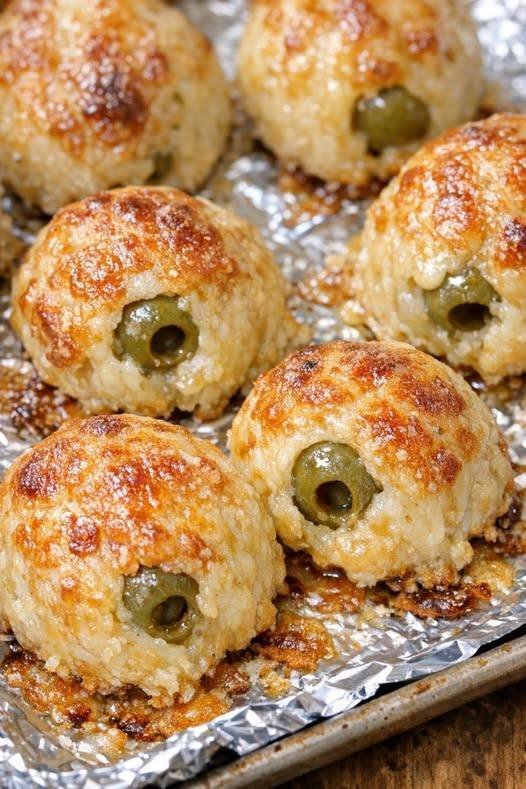
Low-Carb Cheese Olive Bites—a savory, crisp, and utterly addictive snack that’s naturally low in carbohydrates, gluten-free, and packed with flavor. They’re essentially a cheese cracker and an olive roll-up all in one, perfect for parties, charcuterie boards, or a quick fat-forward snack.
The magic of this recipe is in the baking process: shredded cheese melts, its oils separate, and it bakes into a lacy, crispy, frico-like shell around the briny olive. The result is a crunchy, cheesy, salty bite that satisfies any craving for something savory.
Low-Carb Cheese Olive Bites
Yields: 24-30 bites
Total Time: 25 minutes
Ingredients
-
2 cups shredded cheese (see cheese guide below)
-
1 (6-7 oz) jar pitted green olives or kalamata olives (Manzanilla olives with pimentos are classic), well-drained and patted VERY dry
-
1/2 teaspoon garlic powder (optional)
-
1/2 teaspoon smoked paprika or cayenne pepper (optional, for a spicy kick)
-
Fresh thyme leaves or rosemary (optional, finely minced)
Note: You only need 2 main ingredients—cheese and olives. The seasonings are enhancers.
Instructions
1. Prep the Oven and the Olives
-
Preheat your oven to 400°F (200°C). Line a large baking sheet with parchment paper or a silicone baking mat. Do not skip this—cheese will stick to bare metal or foil.
-
The most critical step: drain the olives and pat them extremely dry with paper towels. Any moisture from the olive brine will make the cheese cracker soggy. Let them sit on a paper towel-lined plate to air dry while the oven preheats.
2. Create the Cheese Mounds
-
In a medium bowl, toss the shredded cheese with the garlic powder, paprika, or fresh herbs, if using.
-
Place level, heaping tablespoons of the shredded cheese onto the prepared baking sheet, spacing them about 2 inches apart. You want small, flat, circular mounds.
-
Gently press an olive directly into the center of each cheese mound. Don’t push it all the way through to the pan; just nestle it in so it’s enveloped by cheese but still visible.
3. Bake to Lacy, Golden Perfection
-
Bake on the center rack for 5-8 minutes. Watch them like a hawk after the 4-minute mark. They are done when the cheese has melted, is bubbling vigorously, and the edges are a deep golden brown.
-
The cheese should look lacy and slightly translucent around the olive. If the edges are pale, they will be chewy, not crispy, so let them get a good color.
4. Cool Completely
-
Remove the pan from the oven and let the bites cool completely on the parchment paper on the baking sheet. This takes about 10-15 minutes. Do not attempt to move them while they’re hot and flexible—they will fall apart.
-
As they cool, the cheese will harden and become perfectly crisp and chip-like. Once cooled, they will lift right off the parchment.
The Cheese Guide: Which One Works Best?
The cheese you choose will dramatically change the flavor and texture. All shredded cheese should be freshly shredded off a block for best melting (pre-shredded bagged cheese has anti-caking powder that can inhibit the “lacing” effect).
-
Parmesan (Best for Lacey Crisps): Creates the crispiest, most delicate, lacy wafer. Nutty flavor. Bake time is shorter, about 4-6 minutes.
-
Sharp Cheddar (Most Classic): The grease content will pool slightly, making a crisp, rich cracker that tastes like a Cheez-It. The ultimate crowd-pleaser.
-
Asiago or Pecorino: Similar to Parmesan with a sharper bite.
-
Gouda or Provolone: Milder flavor, less lacy, more of a uniform crispy disk.
-
Blend: A 50/50 mix of cheddar and parmesan is the sweet spot—giving you the crispness of parmesan with the rich flavor and good “grease factor” of cheddar.
Tips for Perfect Crispy Bites Every Time
-
Pat the Olives Dry, Then Dry Again: The #1 reason these fail is moisture. Wet olives will steam the cheese and stop it from crisping up. I let mine sit on paper towels for 10 minutes, pressing gently to wick away every last drop of brine.
-
Space is Key: The cheese pools will spread to about 2-3 inches wide. Give them ample room or they will merge into one giant sheet of cheese (which is still delicious, just not individual bites).
-
Room Temperature Serving: They are best eaten the same day they are made, at room temperature, when the cheese is at its snappiest.
-
To Re-Crisp: If they soften (humidity can do this), place them back on a parchment-lined sheet in a 350°F oven for 2-3 minutes, then let them cool again. They’ll re-crisp beautifully.
Flavor Combinations
-
Dirty Martini Bites: Use blue cheese crumbles with the cheddar for the cheese mound. Stuff the center with a pimento-stuffed green olive. A tiny sprinkle of lemon zest when they come out of the oven sends them over the top.
-
Pizza Bites: Use mozzarella and parmesan. Nestle a slice of pepperoni in the cheese with a small pitted black olive. Sprinkle with dried oregano before baking.
-
Jalapeño Popper Bites: Use a cheddar-jack blend and nestle a pickled jalapeño slice next to the olive.
These little one-bite wonders are a staple for low-carb and keto gatherings, but honestly, everyone devours them without caring about the carbs. Enjoy! Let me know which cheese combo you try.